


Your Ultimate Guide to Plumbing a Double Kitchen Sink
Curious how to plumb a double sink? Our guide to double kitchen sinks covers the plumbing configuration, P-trap installation, and drain lines. Learn the right way to connect a sink basin for a watertight seal.
If you’ve been looking to upgrade your single basin sink, your kitchen’s “traffic flow” likely needs an update. Preparing your kitchen for a larger double sink involves updating the plumbing configuration to ensure both sides of the unit drain effectively.
Think of double-sink plumbing like a highway merge: each sink basin has an individual drain tailpiece that must join at a sanitary tee before entering the P-trap drain. Whether as a standard setup or a swing tee trap, this directs the waste flow from both basins into a single drainage line, preventing backups.
Most sinks follow a similar installation process, double-sinks included. You don’t need to be a master plumber to succeed, but precision matters to avoid messy leaks. Follow our guide below to learn how to handle double kitchen sink plumbing.
How to Install Double Kitchen Sink Plumbing
Installing a new double sink starts with setting up the right plumbing configuration. You’ll need to fix a few more connections than a single-basin sink, but these straightforward steps will help you ensure a watertight seal and a smooth flow.
Step 1: Prepare the Countertop and Measure Sink Holes
First, free up space to accommodate a large double sink. Measure your available countertop surface and make sink holes according to the size of the unit you wish to install.
The basins should fit securely through the openings, while the edges should be placed on the sides of the counter to provide proper support.
Step 2: Shut Off Water and Prepare the Plumbing System
Turn off the water using the hot and cold isolation valves. If your system doesn’t have isolation valves, shut the water off at the main valve instead. Afterwards, drain the lines before moving on to the next step.
Step 3: Install Sink Basket Strainers for a Watertight Seal
Before installing the sink in the counter, install the basket strainers. These consist of a drain and a strainer basket.
To ensure a watertight seal, apply plumber’s putty or caulk to the bottom of the sink strainers and lower them into the drainage hole at the bottom of the sink basin. Secure them by tightening the strainer nut.
Step 4: Mount the Sink to the Countertop
How you mount the sink depends on its type:
- For a drop-in sink, apply silicone caulk along the countertop edge to secure the rim.
- For an undermount sink, apply caulk around the edges of the sink holes before installing the unit. In this case, the edges need to be secured beneath the countertop with industrial-strength clips or adhesive.
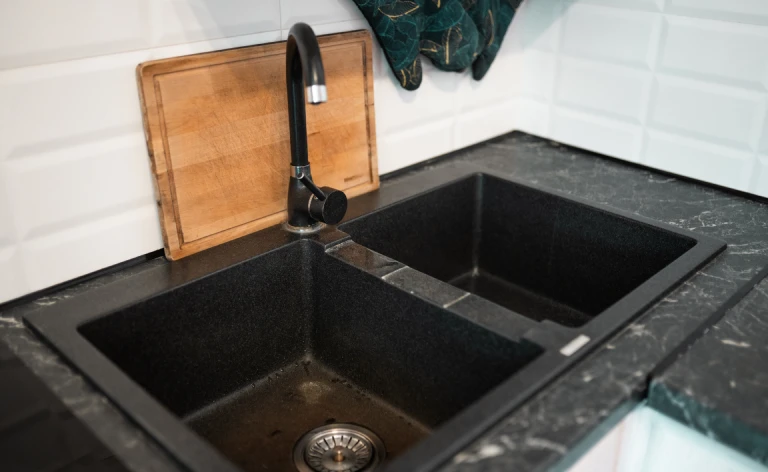
Image Source: Shutterstock
Step 5: Align the Drain Tailpieces and Drain Outlet Pipe
With the sink affixed, you can see how the drain outlet pipe will connect with the basket strainers.
Use a tape measure to find the height of your drain pipes. It needs to be high enough to accommodate the P-trap but low enough to allot space for the sanitary tee and drain tailpieces.
Mark and cut your PVC pipe accordingly using a PVC cutter.
Step 6: Connect the Sanitary Tee and P Trap
Install the sanitary tee between the two basins. Next, proceed to the drain trap, also known as a P-trap. This component consists of a U-shaped trap (or U-shaped fitting) and a J-shaped trap (or J-shaped fitting).
Fix the sanitary tee to the U-shaped fitting and bridge it to the J-shaped trap, which finalizes the drainage line by linking with the main drain. Use slip-on compression nuts to connect the pieces.
Step 7: Install the Faucet and Connect Water Lines
Next, mount the faucet by threading the mounting bracket and the hot and cold water lines down through the countertop.
Use channel locks to tighten the nuts at the bottom of the faucet to ensure it is securely fastened. Connect the cold and hot lines to their respective pipes and tighten with channel locks.
Step 8: Inspect for Leaks and Trapped Air
As a final step, inspect for leaks by switching on the isolation valves. Open the faucet to release any trapped air and allow the hot and cold water to run.
If the flow is steady and there is no moisture at the connection points, you have successfully completed your double sink plumbing.
No leaks? Good job!
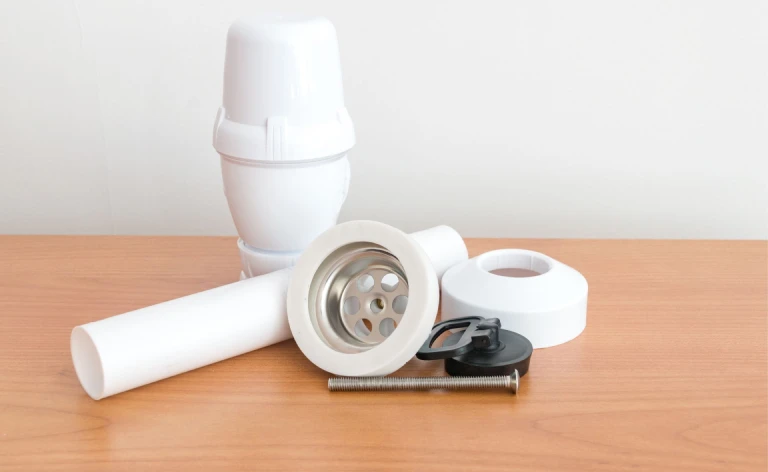
Image Source: Shutterstock
FAQs About Double Kitchen Sink Plumbing
How do I unclog a clogged double sink?
How to install double kitchen sink plumbing?
How do I unclog one side of a double sink?
Can I use a plumbing snake in a double sink?
Key Takeaways
- Measure before you cut: Ensure the double sink fits the countertop openings, and secure the edges to support the unit’s weight.
- Prioritize watertight seals: Always apply plumber’s putty or silicone caulk to the basket strainers to create a waterproof barrier and prevent leaks.
- Optimize the layout: Use individual drain tailpieces for each sink basin, each connecting to a sanitary tee before entering the p-trap.
- Maintain proper slope: Aim for a downward slope of roughly ¼ inch per foot for your drain lines to ensure smooth, gravity-fed flow.
- Address Venting needs: If your plumbing configuration lacks a wall vent, installing an air admittance valve can prevent gurgling and negative pressure.
- Conduct a final leak test: Open your isolation valves and run both hot and cold water to inspect every PVC pipe connection for moisture.
A Helping Hand from the Experts at PlumbWize
While DIY sink installation projects can be rewarding, wrong measurements or loose fittings can lead to significant water damage. If the installation process feels too complex or if you are dealing with a stubborn, clogged drain, PlumbWize is here to help.
We pride ourselves on being a trusted and reliable service provider with over 60 years of combined experience in the plumbing industry. We believe in total transparency, which is why we offer an upfront quote with no hidden fees and affordable service rates that fit your budget.
Whether you need residential plumbing help in Oakville, Hamilton, Burlington, or Milton, our team of professional, licensed plumbers is on standby 24/7 for any plumbing emergencies.
Contact us today to schedule your appointment and experience the most comprehensive plumbing service in Ontario!
Zak and Jay
OwnerZak and Jay are licensed plumbers proudly serving Burlington, Oakville, and Hamilton areas. With over 20 years of experience each, they specialize in residential and commercial plumbing solutions, including general repairs, drain cleaning, new installations, and 24/7 emergency services. As certified professionals, Zak and Jay are committed to providing reliable, honest, and high-quality workmanship. Their dedication to customer care has earned them a reputation as trusted plumbing experts in the Burlington, Oakville, and Hamilton area.
 0
0 905-332-8222